How to Decorate Sugar Cookies

Decorating cookies may seem daunting, but with some simple ingredients and a little extra time and care, these iced sugar cookie are easily attainable.
In this tutorial, learn my tips for making clean, colorful, and delicious cookies.
To achieve beautiful results, starting with a strong base is key.
One of the most common mistakes I see is over-baking sugar cookies, which become crunchy, dry, and burnt. The key to fixing this is rolling the dough to be thicker. When rolled thicker, the cookies will have a nice bite while being chewy and stable enough to hold the weight of the icing. Preference also plays into this decision, but ¼ inch is generally the thickness of dough you’ll want. I used a chocolate roll out cookie recipe from Smitten Kitchen.
When rolling out your cookie dough, take your time to ensure the dough circumference is even. I like to run my hand along the top to see if there are any rolling pin imprints or if certain spots are uneven. Cookie dough can be finicky and stick to the rolling pin. To avoid this, make sure the dough stays chilled and your surface is well-floured. Work carefully and take your time with it! I like to use a bench scraper or an offset spatula to transfer the cookie cut-outs from my counter to the baking sheet, which I line with parchment paper. Bake just until the cookie is cooked through. It will continue to cook once removed from the oven, resulting in perfectly baked cookies. Cool completely.
Now, on to icing.
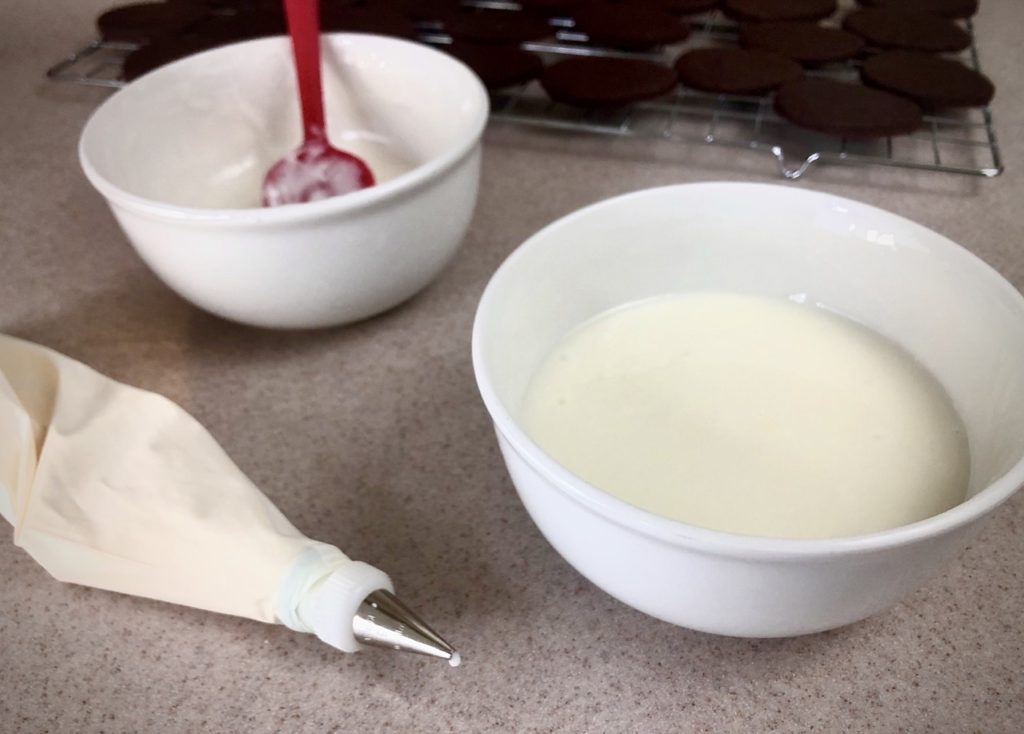
Powdered sugar, milk, and some lemon juice are all you need. I’m hesitant to give exact measurements, because I add as I go until I’ve reached my desired consistency. To give an idea, I start with about 2 cups of powdered sugar, about ¼ cup milk, 1 teaspoon lemon juice and go from there. You can easily add more milk to thin the icing or more sugar to thicken it. The icing is naturally very sweet, but I find it balances the richness of the chocolate cookie.
Once I’ve mixed up this icing, it should be the consistency of toothpaste. It’s fairly thick, not too runny, and will pipe a nice border around the cookie. I reserve about 1 cup of this icing for piping and put the rest in another bowl.
The icing in this second bowl should be the consistency of a thick craft glue. It’s runnier than the first, but not watery or very bubbly. Simply add milk and stir until you reach this consistency. You should be able to drag a toothpick through the bowl and see the icing quickly close over the line you’ve drawn.
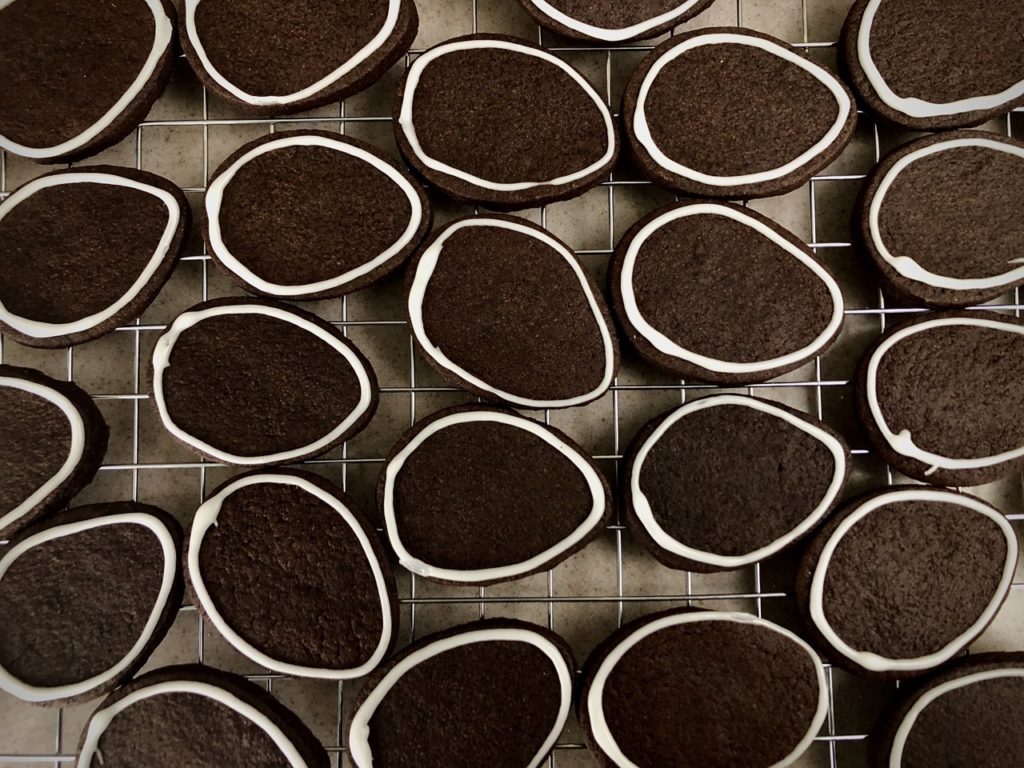
Fill a piping bag with a small round tip (I use #3) and the thicker icing from your first bowl. Pipe an outline around the cookies and allow to dry until firm to the touch.
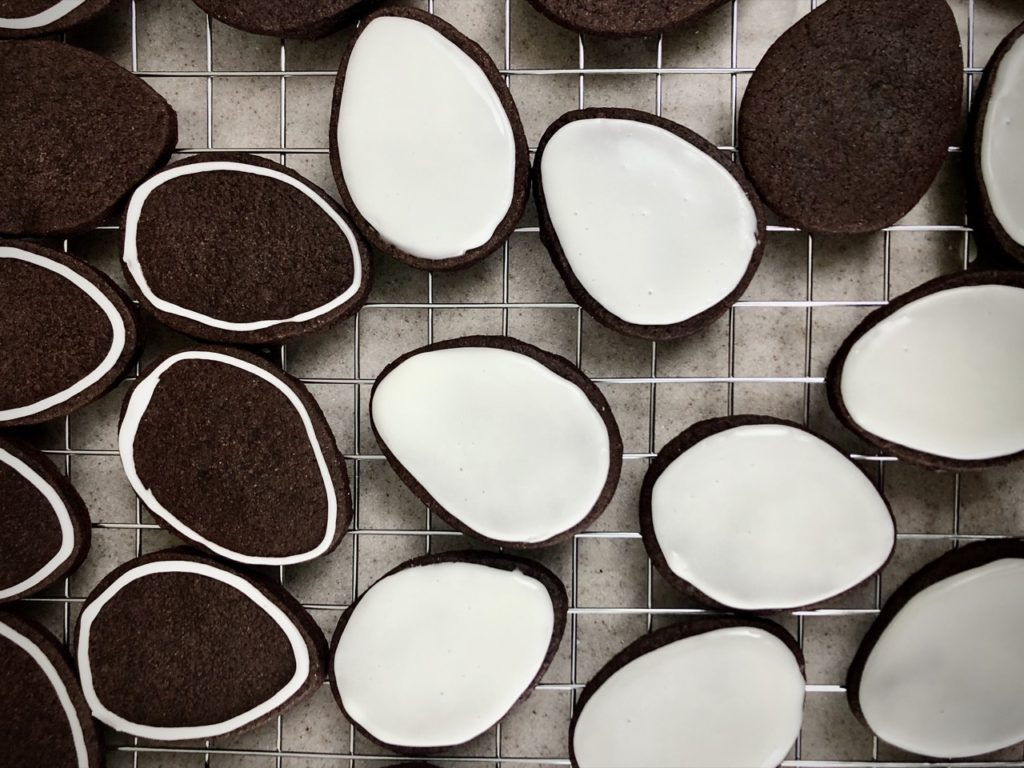
Next, use a spoon to pour a small amount of icing within the borders. I drag the icing out with a toothpick until it covers the edge and fills out any gaps. Blend the border with this icing for a clean finish. Allow these to air dry until set.
On to the decorating.
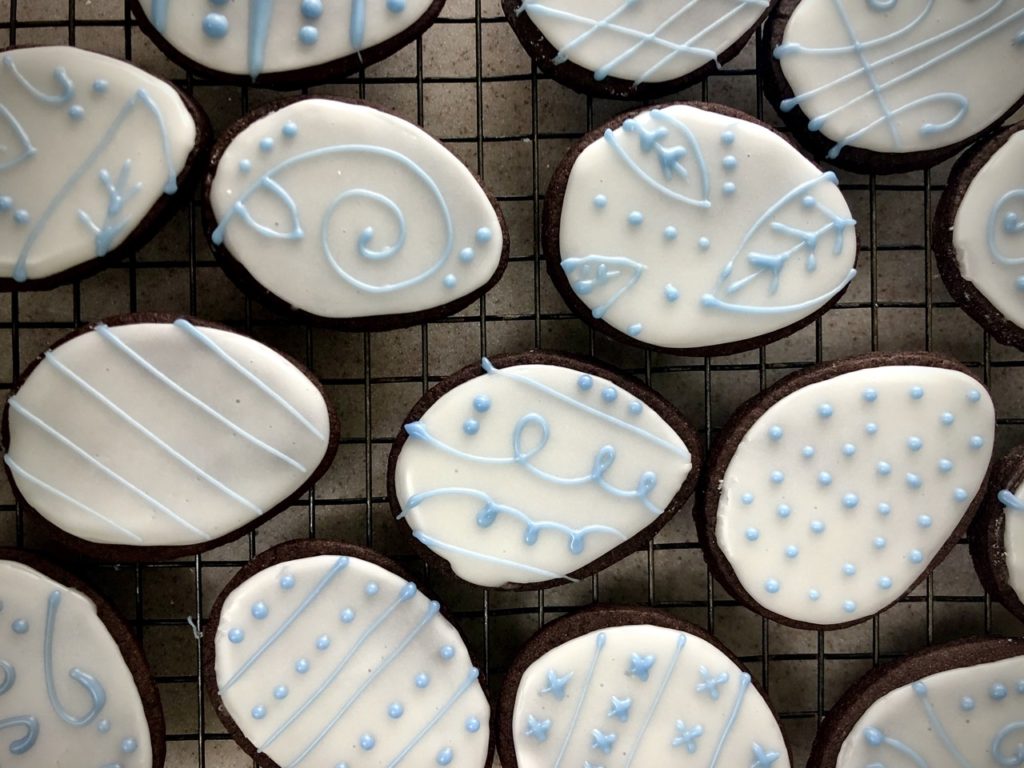
Feel free to decorate these however you please. I colored some of the thicker icing with Wilton’s cornflower blue food coloring, filled a piping bag with a #1 round tip, and played around.
Lines, swirls and dots are just some of the patterns I tried to use. The blue goes nicely with the white, so I tried to keep the design open and spacious on the cookie so the color could really pop.
Try it out for yourself and enjoy the possibilities!